
I spend a lot of time tidying up the user interface on XenApp and XenDesktop sessions so users are protected from – well, themselves, most of the time. When you are running on a VMWare platform, however, there are some additional considerations you might need to take to keep them out of trouble. VMWare, by default, lists the NIC and hard drive as removable drives for the user, and offers them the function to “Eject” them. Now, the hard drive ejection doesn’t work unless the user is an administrator, but the NIC sometimes does – and that will cause you an issue, especially on a shared XenApp system. Personally, the best way is to disable the hot-plug option in VMWare so that users can only see “real” removable devices in the removable devices menu in the notification area.
How to do this, then? Well, it can be done either through VirtualCenter, or by editing the vmx file of your virtual machines directly. You could do it by using a Lockdown item in AppSense Environment Manager – but that would be going about it the wrong way, as there are tools native to the hypervisor to do this and they don’t rely on enforcing the fix at every login. Whatever the choice you make about doing it, if you are using a provisioning method such as Citrix Provisioning Services or one of its peers, the best idea is to bake these changes into the gold image or template.
To disable the HotPlug capability using vSphere Client:
Connect vSphere Client to ESX or vCenter Server.
Power off the virtual machine.
Right-click the virtual machine and click Edit Settings.
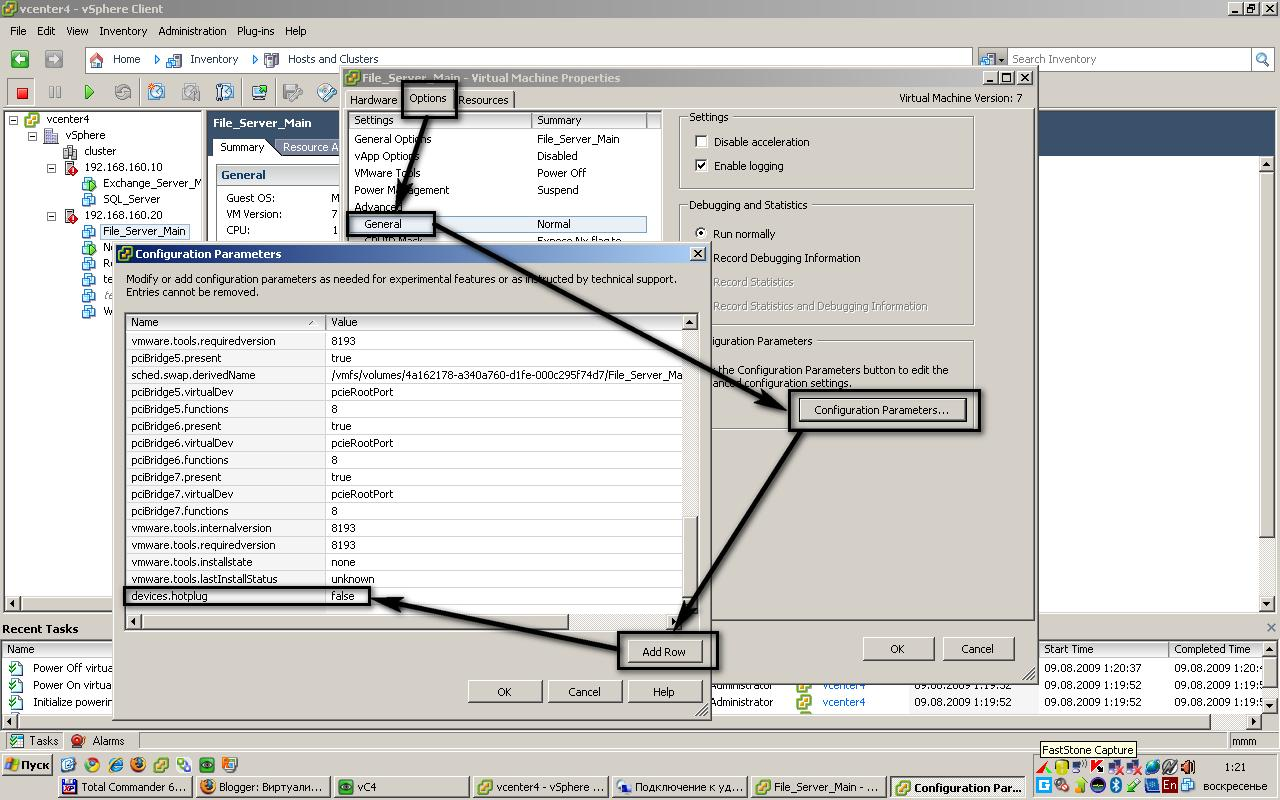
Click the Options tab.
Click General | Configuration Parameters | Add Row.
Insert a new row with the name devices.hotplug and value false.
Power on the virtual machine
To disable the HotPlug capability by editing the .vmx file:
Power off the virtual machine.
Access the ESX service console using an SSH client.
Open the virtual machine configuration file (.vmx) in a text editor. The default location is /vmfs/volumes/<datastore_name>/<vm_name>/<vm_name>.vmx.
Add the line:
devices.hotplug = “false”
Note: This setting does not interfere with HotPlug CPU/memory.
Save the file.
Power on the virtual machine.
Below is a screenshot of how to edit the config in an (admittedly fairly old) VirtualCenter client.
Once you implement this, your users should be prevented from yet another way of getting themselves (and possibly others) into a spot of bother.

