
A long time ago I did a post on how to detect iPad and/or iPhone sessions. Whilst effective (at the time), it was rather blunt and prone to becoming useless as soon as the hardware changed in any way. So since then I’ve been meaning to try and find a slightly more reliable way to perform detection routines on a connecting client.
Firstly, why would you want to know the OS of a client connecting to your Citrix infrastructure? Well, as mentioned in the original post, you can tailor the user experience based on the device the user is utilizing – resolution- and control-wise. You could block certain devices from being able to launch sessions or apps, should you wish to. You can also gather statistics on your connecting devices, if you need to report on how many users are using particular devices. There’s probably a plethora of uses you could come up with, so the reason I like to build this into my configurations is that when the day comes that you have a requirement to know this, it’s already there, just waiting to be utilized.
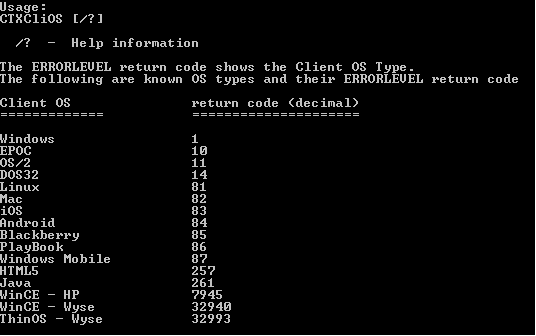
Secondly, as a total dinosaur, I fell back on my natural tendencies and elected to use CTXCliOS.exe from the clever guys at Ctrl-Alt-Del IT Consultancy to provide me with the information I need. If you’ve never come across their utilities before, they are well worth a look – any terminal server admin worth his salt can definitely find some mileage in the freeware utilities they provide on their site. The caveat around CTXCliOS is that it will only run on Citrix systems (so if you’re looking to do this on RDS, that’ll probably have to wait until I can brush up on my scripting). The utility returns values for the systems shown in the screenshot below, so it’s fairly comprehensive.
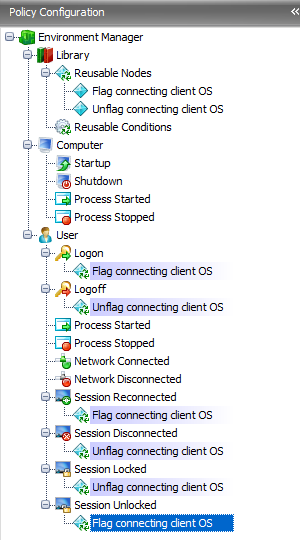
Naturally it makes sense to do this via a Reusable Node. We are going to write the result of the query into the Registry at HKCU\Software\Custom\AppSense in a value called ClientOS, but naturally you can tailor the type and format of the flag to whatever you feel comfortable with.
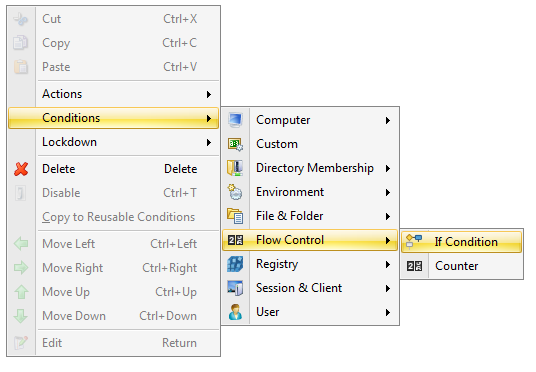
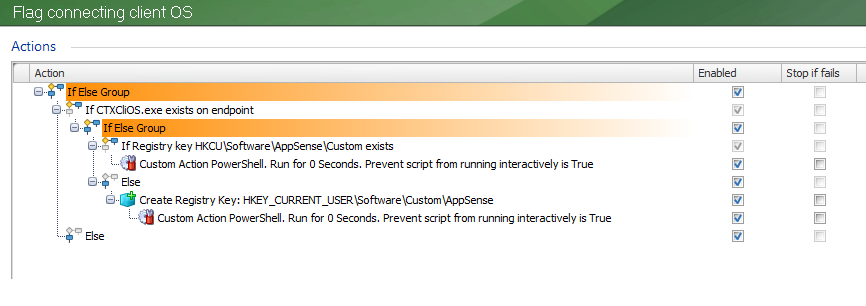
As we need to check whether the CTXCliOS.exe utility is actually present on the Citrix system before we can execute it, it would also make sense to do this via an If Else Group, which if you remember are found in the context menu of your EM console under Condition | Flow Control | If Condition.
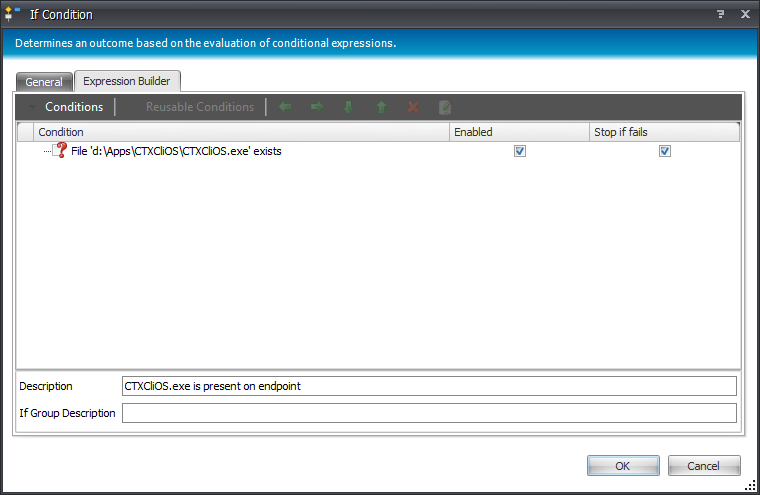
In the Expression Builder window we will now add a Condition to check for the existence of our executable. If you’ve got the executable stashed away on a share somewhere, you could always perform some sort of file copy Action to make sure it’s always available, but for the purposes of this example in which we are dealing with a PVS system, we’ll just list the client OS as UNKNOWN if the executable isn’t there. As PVS should ensure all Citrix systems are identical, we’re pretty sure that the executable should always be there.
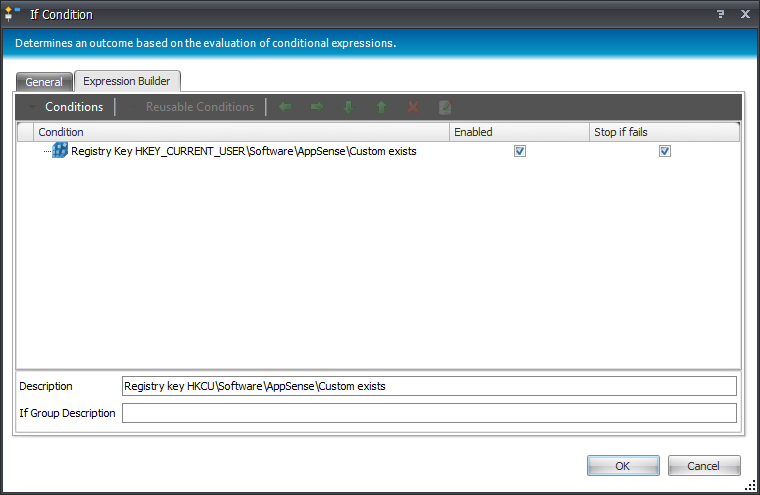
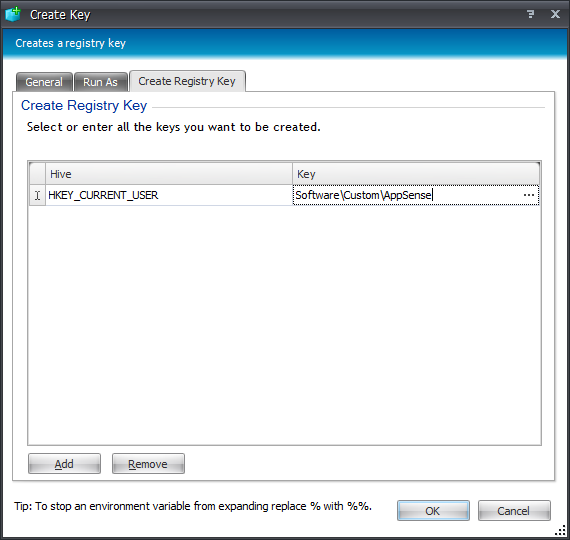
If the file exists, we’ll next need to check that the target Registry key to hold our flag value exists. If it doesn’t exist, we can use an EM Action to create it, so let’s do something a bit funky here, and nest an If Else Group inside another one.
In the Else section of this nested If Else Group, we will need to create the Registry key if it doesn’t exist, so we will add that Action now
Now, we need to actually run CTXCliOS.exe and write the value to the Registry. However, as it’s a command-line tool, if we write a separate command-line batch script to trigger it, we will have yet another file (in this case a .bat or .cmd file) to worry about providing on the endpoint. Is there a better way to trigger the command-line executable from within AppSense EM?
Well of course there is, don’t forget that Environment Manager has built-in scripting support for JScript, VBScript and PowerShell. Wherever possible, I’d recommend that you exclusively use PowerShell to do your various scripting bits and bobs, because it’s becoming something of a standard across various different software technologies. In fact, now that I mention it – I hope my loyal readers love the way I tend to remember things halfway through writing posts – there are PowerShell extensions for Citrix that can probably achieve what I am trying to do here without leveraging an external file. Well – I’ve started doing it this way now, and it seems like a useful exercise, so I will leave the thought of moving this whole process exclusively into PowerShell for the future 🙂
So next we will need to insert a Custom Action under both parts of the nested If Else Group. As I’m not much of a PowerShell guru (yet!), I must send a credit to Ben Scott (for throwing me a fish) and Michael B Smith (for trying to show me how to fish) for their help in creating this simplistic line or two of code.
The Custom Action uses this script
$match = & d:\apps\CTXCliOS\CTXCliOS.exe | Select-String -Pattern ‘ClientOS=(.+)’
if($match) {
$clientOS = $match.Matches[0].Groups[1].Value
Set-ItemProperty -Path ‘HKCU:\Software\Custom\AppSense’ -Name ClientOS -Value $clientOS
}
which runs CTXCliOS.exe from the path specified, pulls the required part of the output, and writes it into the Registry at HKCU\Software\Custom\AppSense in a value called ClientOS. So now your entire nested pair of If Else Groups should look something like this
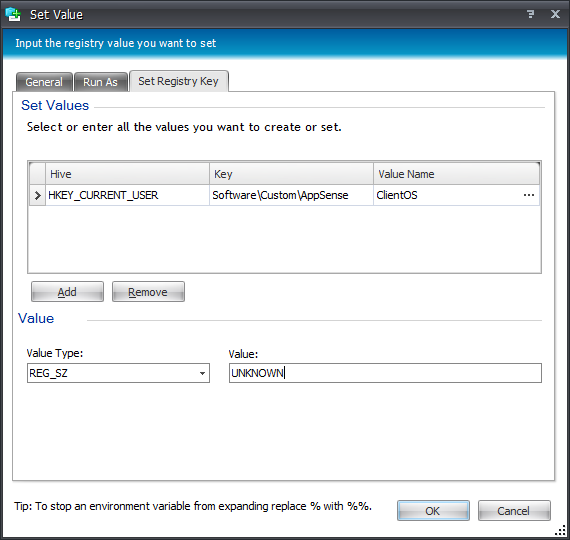
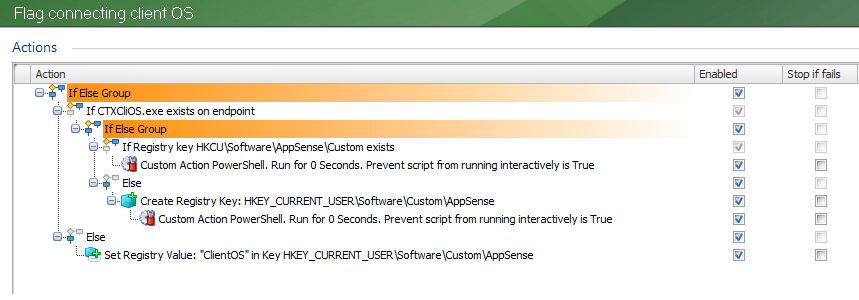
Now the final thing to do for this part is to complete the original If Else Group by providing an Action for the Else section, which in this case would be to write an “UNKNOWN” value to the Registry for ClientOS, because if it reaches this stage it means that CTXCliOS.exe can’t be found
So, the entire Reusable Node now looks like this
and we can reference this Reusable Node in the Logon trigger to ensure that we have a record of the connecting client OS. Cool!
However, let’s not forget that a user can disconnect from a session and reconnect from another device, so we will create another Reusable Node to unflag the OS (i.e. delete the Registry value we created)

So there we have it – a way to write the connecting client OS on your Citrix systems into the Registry for manipulation in any way you see fit. The configuration we created in this post is available here, should you wish to download it for yourself – the usual caveats apply.

