
I still get a lot of emails and queries from people about how to manipulate Personalization Server data. So today, although to many of you this may be basic stuff, we will have a quick run-through of how to make sure your use of the APPSENSESPECIAL command switch is correct, and a few troubleshooting techniques you can use with it.
Situations where APPSENSESPECIAL can be used
APPSENSESPECIAL is used specifically when you need to manipulate data stored in Personalization Server. You might want to do things such as:-
a) remove a file, folder or Registry key/value that has been mistakenly copied into Personalization data
b) add a file, folder or Registry key/value to Personalization (although this could easily be done by a Process Started Policy Action instead)
c) transfer existing settings into Personalization data ahead of a migration
d) move Registry or file data from Personalization into the “real” Registry or filesystem
e) allow users to selectively manipulate Personalization data without launching the application (e.g. clearing a cache that interferes with application operation)
Client-specific masquerading apps
In AppSense’s Global Settings you can create a Masquerading Application to allow a specific application access to another (Personalized) application’s data – for instance, allowing the Mail Control Panel applet to access (and therefore configure) Personalized Outlook data, without having to put the apps in an Application Group. This setting, however, is global, so if you need to do anything more targeted, you will have to use APPSENSESPECIAL to produce client-specific masquerading.
What the APPSENSESPECIAL switch does is allows a specified client application to imitate or “masquerade” as the Personalized application, allowing you to open up the virtualized settings and manipulate them with standard tools. When the masquerading app closes, the changed settings are sent back up to the Personalization Server and saved.
It is important to remember how Personalization works
- Managed application starts
- Config file created with file and Registry inclusions detailed
- Virtual cache (%systemdrive%\appsensevirtual) is synchronized with the SQL database
- EM Policy is notified of the process start and any Policy Actions are performed on the virtual cache
- While the application is running, changes to the Registry and filesystem are intercepted and written to the virtual cache, rather than the “actual” Registry or filesystem
- Managed application (or application group) stops
- Virtual cache is synchronized back to the SQL database
Bearing this process in mind should let you understand how the client-specific masquerading apps principle works. Effectively, you are subverting step [1] of this process – launching what the EM Agent believes is a managed process, but which is essentially something else.
Using APPSENSESPECIAL in normal mode
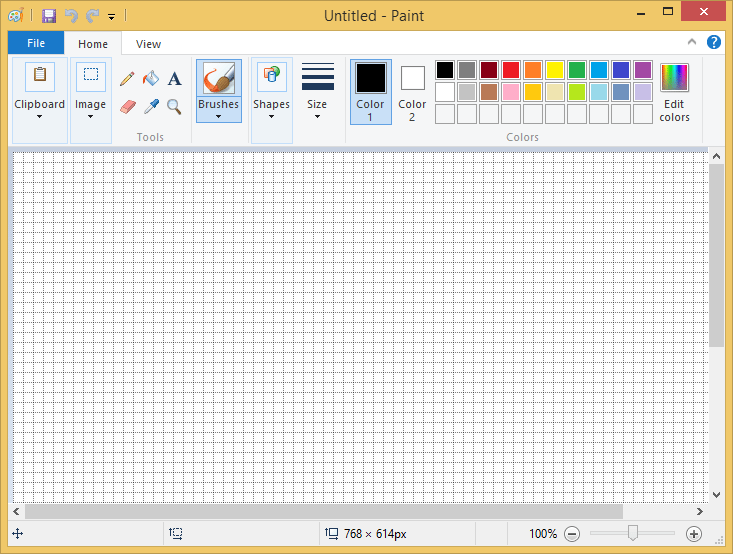
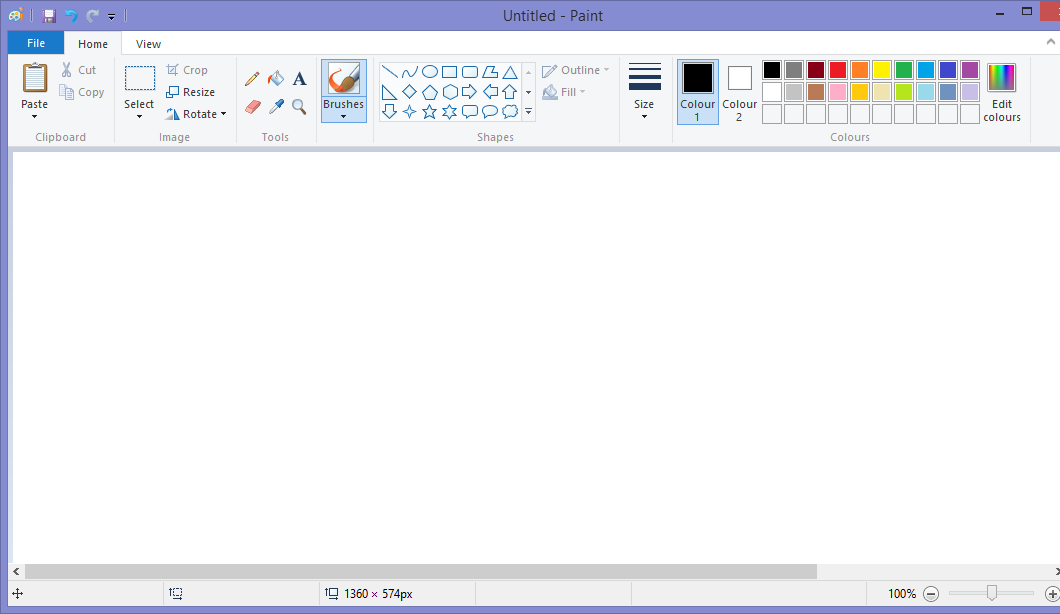
In order to demonstrate how to use APPSENSESPECIAL we will do something very simple. We have configured our Personalization Server to personalize Microsoft Paint (mspaint.exe). What we are going to do is delete the Registry value that applies gridlines to the Paint application as the user logs in. Obviously we could simply do this by changing the setting within the application itself, but that wouldn’t demonstrate how we can alter Personalization data on-the-fly, then, would it? 🙂
If we log on to one of our test desktops and launch Microsoft Paint, we can see that the view is configured to show gridlines, as below. The Paint executable is being Personalized, so the setting persists from endpoint to endpoint, as we’d expect.
The Registry key that controls this can easily be seen by looking through Personalization Analysis
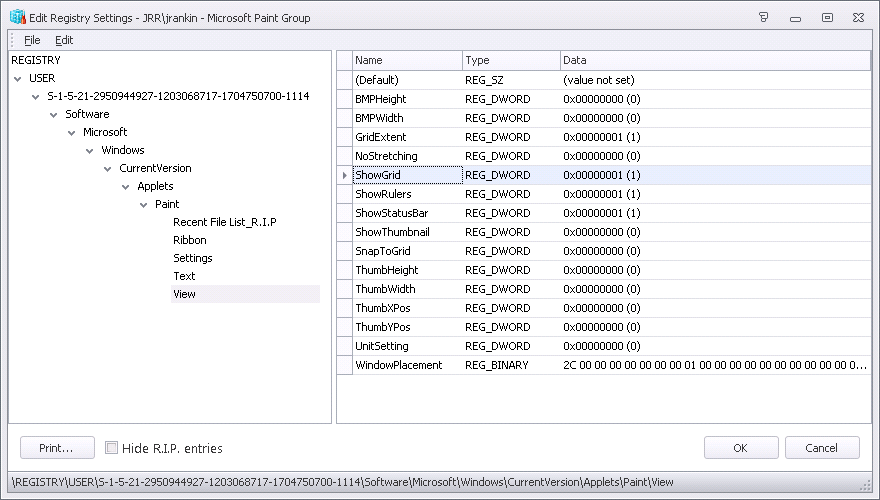
So let’s assume, for some strange reason, we don’t want this user to see the gridlines option next time they open Microsoft Paint. We could just alter it in Personalization Analysis, but if we wanted to do this for a hundred users, it would be a long laborious process. By using APPSENSESPECIAL as part of their logon process, we could actually remove the entry for each user at logon time, saving time and effort – and obviously giving myself a simple task to demonstrate this command with 🙂
The way we can call the manipulation of the Personalization data is by using a Logon Action. The application we will use is cmd.exe. Although you can call any executable and load the Personalization data along with it, cmd.exe is often the preferred one. This is because a lot of other applications sometimes don’t work correctly or as expected when run with lots of extra command-line arguments. Cmd.exe is ideal because you can call out to just about any other external application from it to manipulate the data – xcopy, robocopy, reg, regedit, anything you require really.
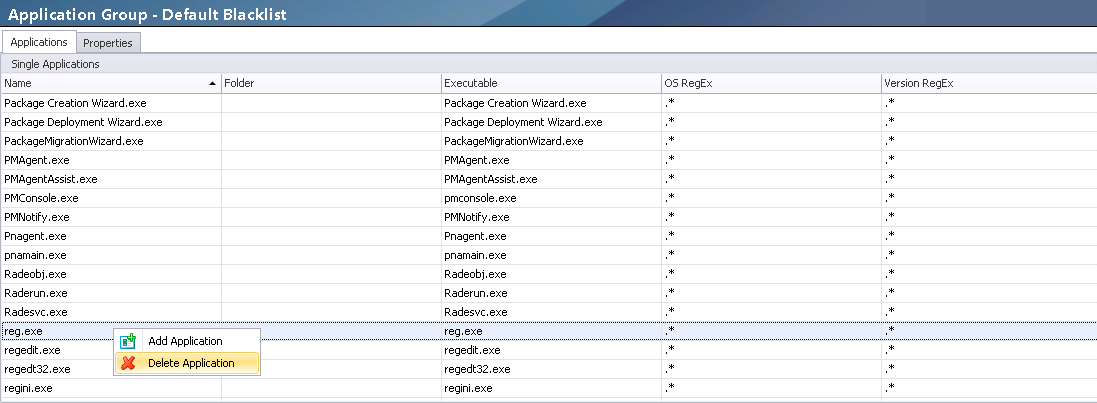
However, if you’re going to use reg.exe or regedit.exe (as we are in this example), you need to make sure they’re not blacklisted in Personalization Server. You can either remove them from the blacklist, or create a copy of the application with a different name (e.g. reg-appsense.exe) and call the copied version instead. The choice is yours.
Once we’ve sorted out the access to reg.exe, here’s the command we will use
c:\windows\system32\cmd.exe /APPSENSESPECIAL:mspaint.exe:0.0.0.0 /c c:\windows\system32\reg.exe add HKCU\Software\Microsoft\Windows\CurrentVersion\Applets\Paint\View /v ShowGrid /t REG_DWORD /d 0
The first part runs cmd.exe with the following /APPSENSESPECIAL switch. After the colon, you supply the name of the executable you wish to load the Personalization data for. After the second colon, supply the version, if you actually need to work with a specific version. If you do need to supply the version, try not to use regular expressions here. If you don’t need a specific version, use 0.0.0.0 as above.
After the /APPSENSESPECIAL switch, the /c parameter allows you to then call the command to manipulate the Personalization data. In this case, we are using reg.exe with the ADD parameter to change the Registry entry that deals with the gridlines in Paint to a 0 instead of a 1.
If you used this as a Logon Action in EM (a very sensible way to call it), the Action would look like this
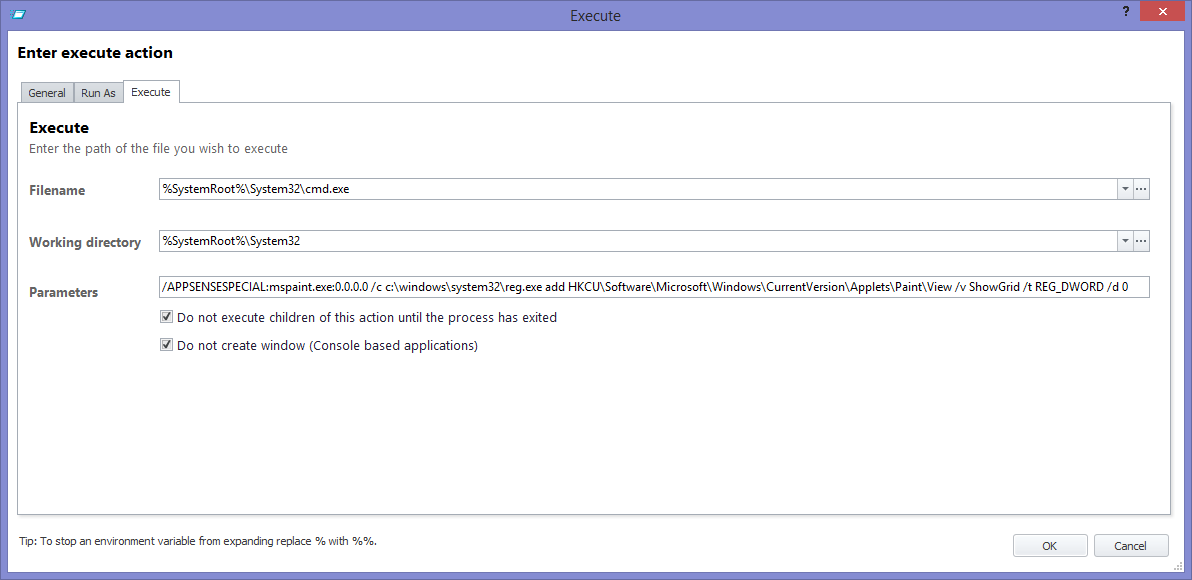
The “do not create window” option obviously hides the execution from the user. The “do not execute children” option should also be selected, particularly if you’re running multiple /APPSENSESPECIAL commands. Running them all together can cause the process to hang, so if you have multiple ones, select this option and nest them inside each other.
Once we’ve saved this Action into our configuration and deployed it, we should now be able to logon and run the Paint executable again. Whereas previously the Personalization data restored the gridlines, this time we don’t see them
So we’ve now demonstrated a very simple way of how to open up and manipulate the Personalization cache. Admittedly, this example simply alters a value – something you could easily do in Policy instead – but it gives you an idea of what can be done.
Expanding the scope of this, you could use this ahead of a migration to load files into Personalization Server ready for the user to be moved across – think Outlook signatures, Word custom dictionaries, all those sorts of things, just use /APPSENSESPECIAL with robocopy or xcopy (although you will also need to enable the migration flag on your Personalization Group to help this process). You could have a user-triggered function that would clear out an application’s cache or temporary files. I’ve used this in the past where the FileTypeExclusions setting has not been configured properly and lots of PDF and DOC files have made their way into Personalization data – the APPSENSESPECIAL switch allowed me to drop these extraneous files from the user’s Personalization profile as they logged in. The amount of uses you will be able to find for this are probably quite wide.
Using APPSENSESPECIAL in interactive mode
What you can also do is use APPSENSESPECIAL in interactive mode. It’s also quite nifty to combine this with Shaun Jones’ wonderful tool PersInfo to see if the application is masquerading correctly.
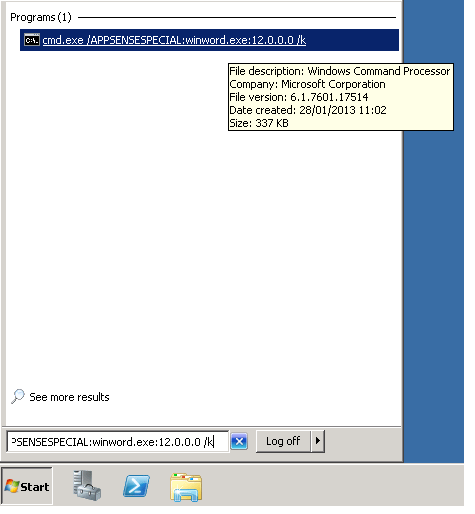
In order to trigger the interactive mode, you would run cmd.exe specifically from the user session, but with the /k switch. Obviously the endpoint needs to have the AppSense agents on it for this to work. Before you start to do this, run PersInfo so it is in the notification area as well.
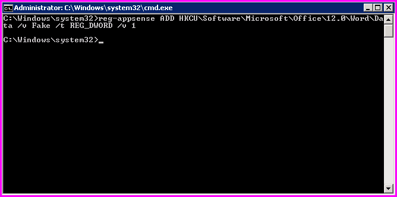
cmd.exe /APPSENSESPECIAL:application.exe:0.0.0.0 /k
As an example, we will load the data for Microsoft Word (version 12)
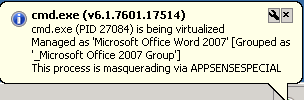
When the instance of cmd.exe launches, you will see (if you’ve got PersInfo running) that it has a funky shocking pink border
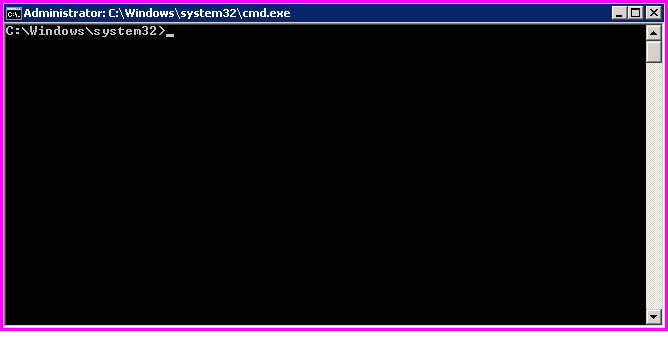
This indicates it is masquerading – a fact you should then see PersInfo confirm for you down in the notification area.
From within your command window, you can now manipulate the Personalization data directly using the commands you choose (note in this example, we are using a copy of reg.exe, reg-appsense.exe, to avoid the blacklist)
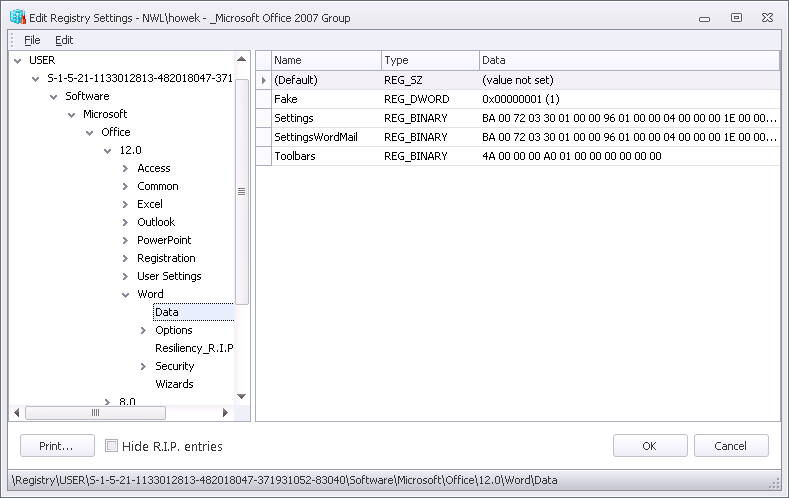
And once you close the masquerading app and it synchronizes with the database, running Personalization Analysis should show the fake data we just inserted
The interactive usage of APPSENSESPECIAL would be more for troubleshooting purposes, which is useful to know if a masquerading application doesn’t behave as you’d expect it to.
I did notice that I had great trouble getting an application to masquerade when, for some reason, two instances of the same process (iexplore.exe) had been added to an Application Group (the x64 and x86 versions had been explicitly defined). This may be worth checking if you can’t get an application to work properly with APPSENSESPECIAL (thanks to AppSense support for sorting that issue out for me).
Summary
So, hopefully this should give you a thorough run-down of how to use, and what you can do with, the APPSENSESPECIAL switch. It is certainly very handy for cleaning up Personalization data and aiding migrations. However, with the arrival of EM 8 FR 5 and its “auto-cleanup” feature, we may not have to leverage the command switch as much in future.

